

How To Specify Recessed Can Lights for the Kitchen
First, please don't call them a can light; they are recessed downlights.
Is there anything worse than lousy downlighting in the kitchen? There's a beautiful kitchen, with exceptional finishes and materials, perfectly laid out. Stunning appliances appointed across the room make it a functional and gorgeous space. And yet, it could be better. At first, it's hard to determine what's wrong. Everything looks perfect. What feels off?
Lighting in the kitchen is one of the most challenging things to get right. But building on the last post about kitchen island lighting, getting recessed downlights right in the kitchen will make or break the space you've worked so hard to design.
In this post, we're going to go over:
Key features of a spec-grade recessed downlight
What you need to consider when choosing recessed downlights
Basic rules for laying out recessed downlights
So let's take it back to the start. Why are we employing recessed lighting? The most basic answer is to provide the right light level to create a functional kitchen. But when designing a kitchen, it's got to be about much more than just getting the right amount of light. If it was just about the raw amount of light big box high hats would get it done.

Lighting Designer: Gottesman Associates
Architect: Quadrangle Architects Ltd.
Interior Designer: Ann Johnson Design
Photograph: Michael T Photography & Design
Far too many amazing kitchens are ruined by big-box store "can lights" that explode visual glare bombs across your eye line. Specification grade (spec-grade) downlights are designed to accomplish two things at once.
Deliver the appropriate amount of light.
Create visually quiet ceilings with limited glare and flash at the ceiling line.
Quite a bit of intelligent engineering needs to happen to make those two things happen at once. Many of you will be familiar with the MR16 lamp-based recessed downlight. The beauty of that form factor was that the optics were contained within the lamp itself. This meant the downlight acted as the power delivery and a shell to provide adjustability and reduce glare. In the age of LED, light engine performance and optics are directly tied to the downlight housing, making it a cohesive unit.
So what does that mean for you as a designer, pulling together a kitchen? It means there are some distinct characteristics to look for when it comes to specifying a recessed downlight.
What Makes A Downlight Spec-Grade?

The first feature is glare control, I know I've already mentioned this earlier in the post, but it's critical to assess the downlight for how well it shields the source. This is usually accomplished by tucking a smaller light source higher in a cone or reflector; this cuts off the viewing angle into the light. This makes it less likely that you'll accidentally catch light in your eyes. The catchphrase for this in the lighting industry is "creating a quiet ceiling," and it should be one of the goals of any lighting scheme.
In residential applications, the next most crucial thing to consider is probably the housing of the fixture. Residential projects require housings to do more things than most commercial applications. Depending on the home's design, you might need fixtures that can fit between beams in the ceiling, you might need insulation rated (IC-rated) housings, or you might need very shallow housings to maximize ceiling height. High-quality manufacturers will give all those options and occasionally be able to combine them.
Downlight / Adjustable / Wallwasher
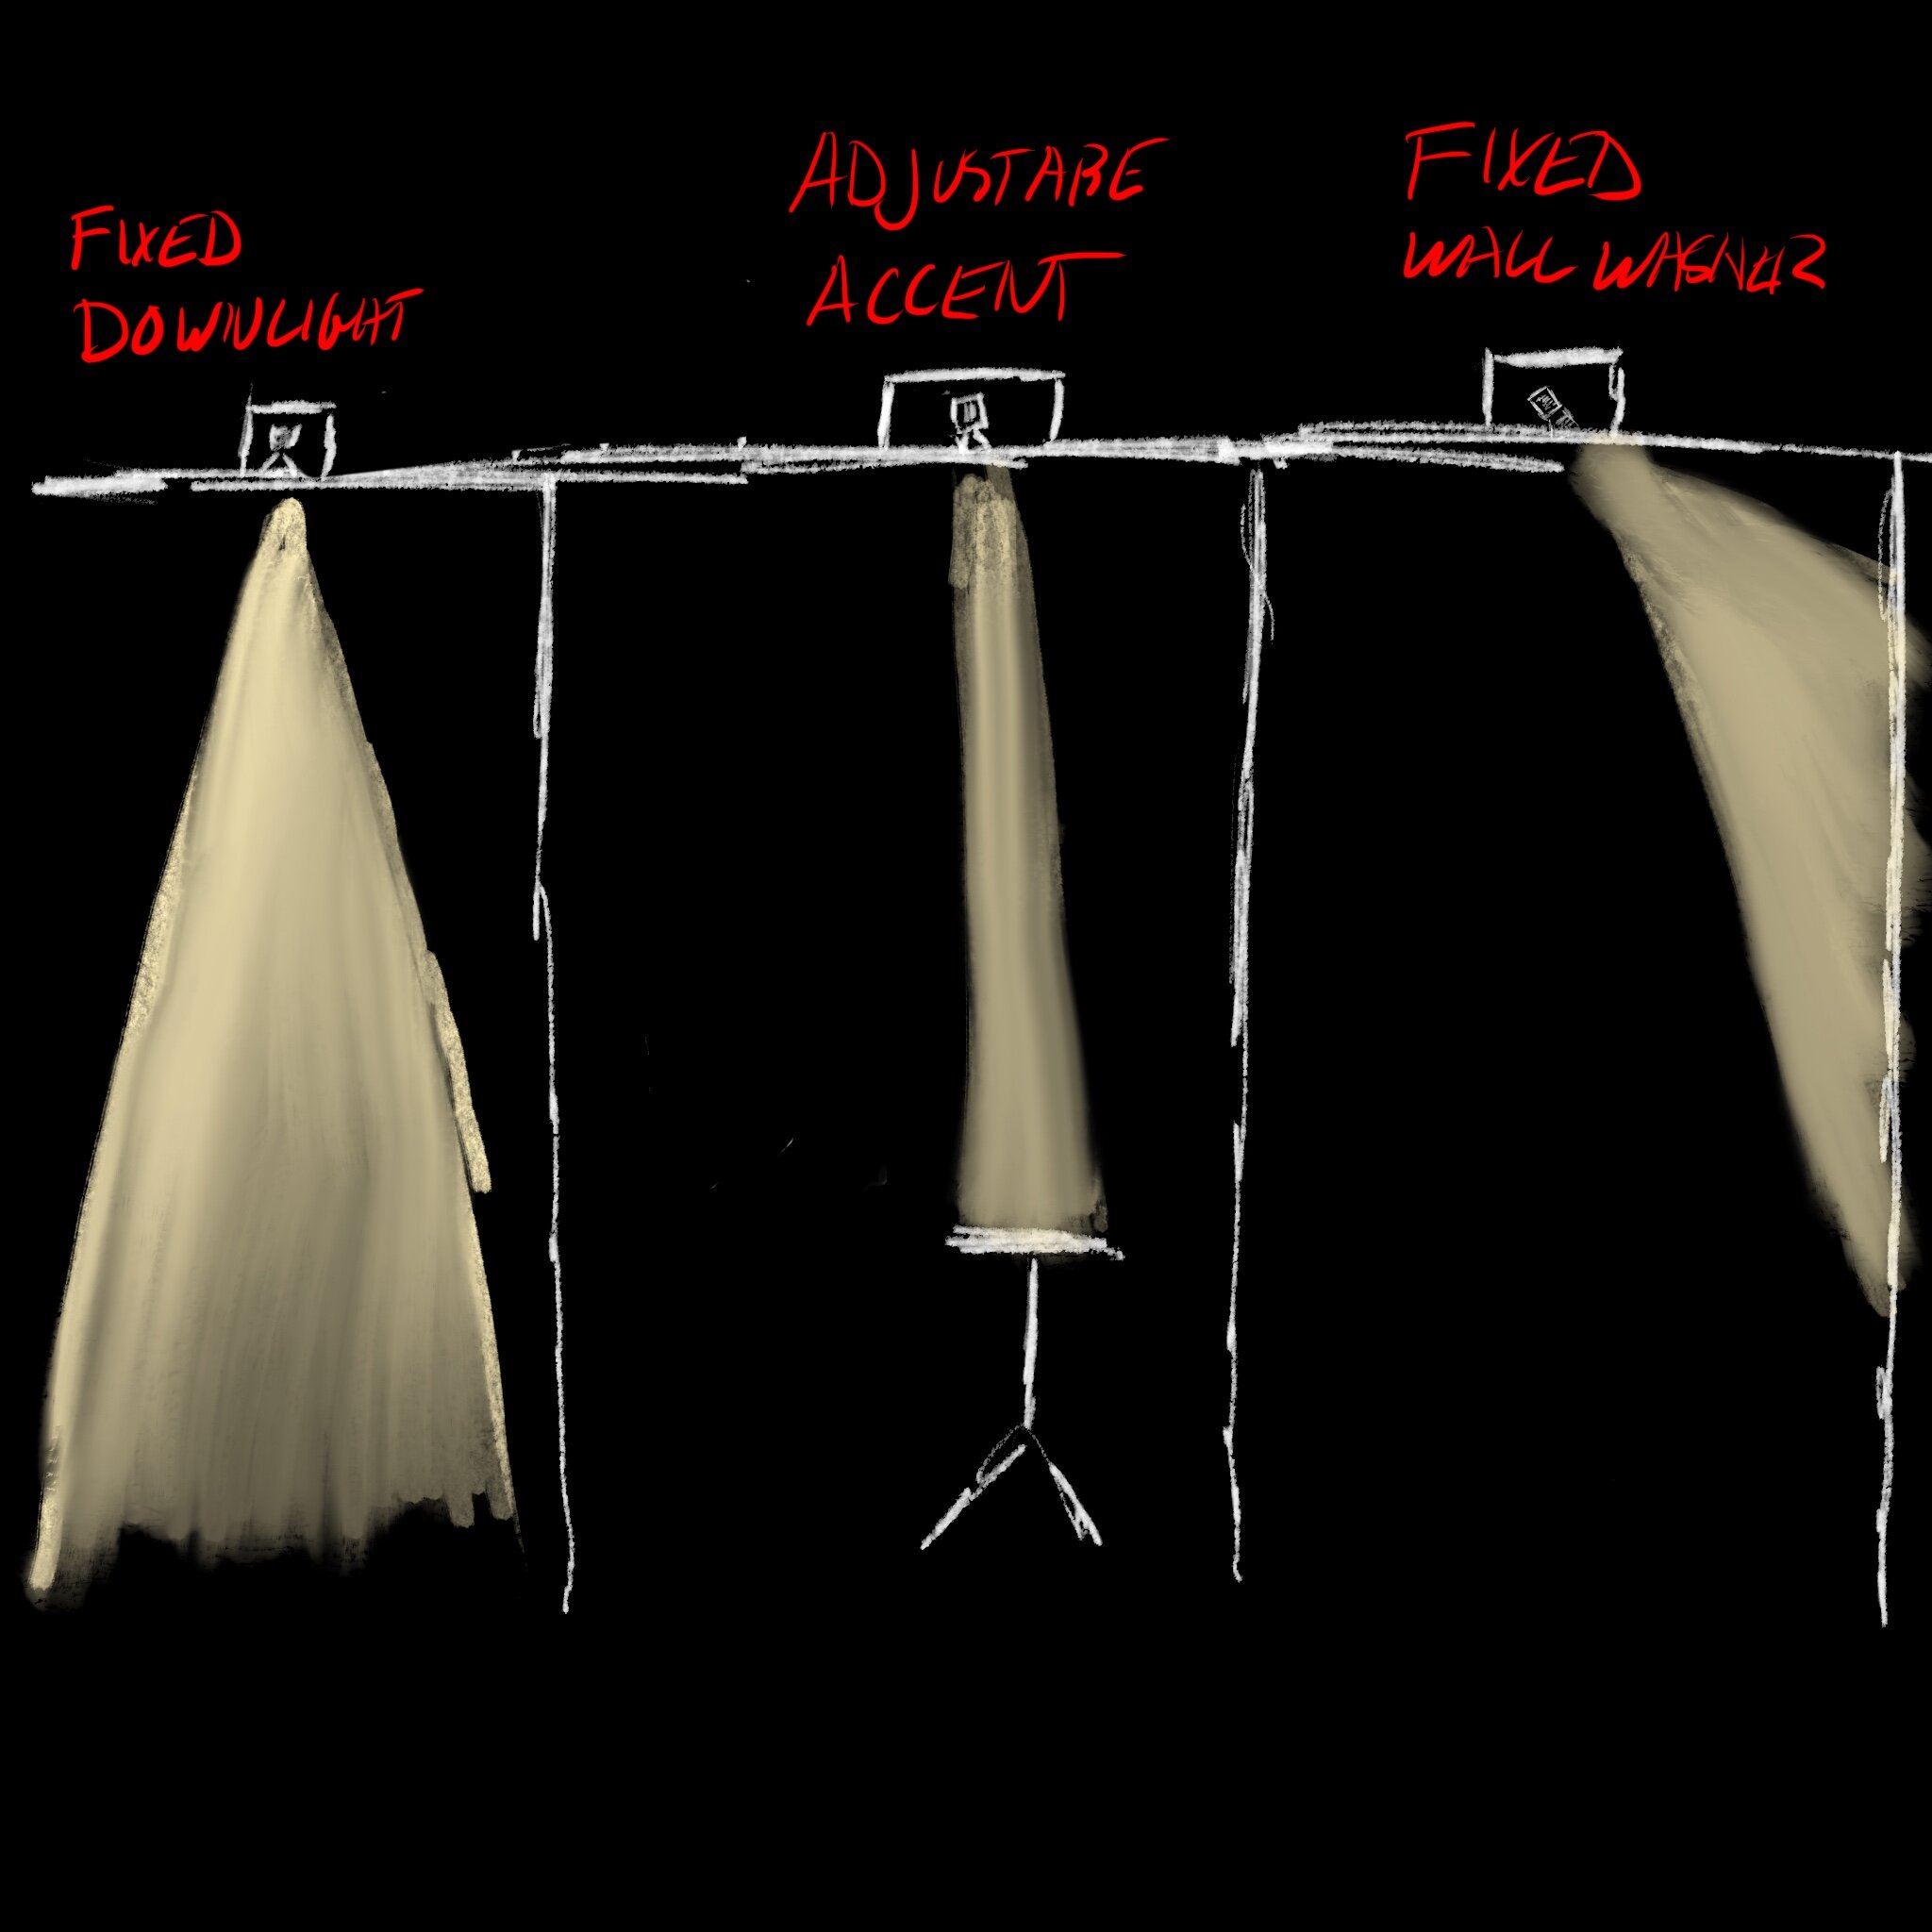
So far, I've only been talking about downlights. But it's important to understand that the recessed lights in the ceiling can be fixed downlights (only point down), fixed wall washers (set and titled to light walls), or adjustable accent lights (meant to be aimed at points of focus). What you need for your kitchen project will depend on the design of the kitchen. But you should only be looking at downlight manufacturers who offer all three options within a product family.
Aperture size

USAI BeveLED Mini
A term that comes up a lot is aperture size. This refers to the opening of the hole in the ceiling. Today, four and a half inches is the largest opening you should be considering. Three-inch and even two-inch are more and more common. Remember, though, smaller aperture sizes are harder to execute for manufacturers without creating glare, so prepare to pay a bit of a premium.
Dimming
Residential dimming and lighting control is a topic unto itself. Entire companies are dedicated to home lighting control, which is ever-increasingly tied into other entertainment and home automation systems. Without doing a deep dive into dimming here (email promo), suffice to say reputable spec-grade manufacturers will provide compatible LED drivers for whatever dimming system is going in the home. You should insist that whatever driver is being used has been tested with the dimmer/dimming system and can dim down to 1% of output. No one likes it when lights pop on and off.
Color Temperature, Dimming, and Romance

USAI Warm Glow Dimming
Residential projects shouldn't be using a color temperature higher than 3000K. (We can have the circadian stimulus debate some other time.) Homes are a place of warmth, safety, rest, and dare I say, romance?. For most of us, lighting at home still has a visual reference point of the incandescent lightbulb. Incandescent lightbulbs burned out about 2800° kelvin. So typically, for residential applications, I recommend a standard CCT of 2700K. But when incandescent and halogen light bulbs are dimmed, they get warmer in terms of their color temperature. Incandescent lightbulbs will start at 2800 Kelvin, but as they dim down, they will shift in color temperature closer to 2000K or even 1800K. That's why it's highly worth considering recessed products that warm as they dim. These LED products mimic halogen and incandescent dimming curves and add another layer of warmth and sophistication to the kitchen space. Dim the lights...let that warmth set the mood.
“Use as many downlights as you need, but as few as you can get away with.”
Beam Angles
Downlights are projector sources, meaning they shoot a beam of light at the target. That beam has a cone shape that will come in different degrees. While there are many beam softeners like lenses to make this cone less sharp in the space, it's essential to know the beam's width as it will give you a way of figuring out where the light will fall in the room. If you're worried about this part of the layout, take heart, manufacturers reps should be able to assist, and most solid manufacturers offer interchangeable reflectors for in-the-field corrections.
Laying Out Recessed Downlights
There are few hard and fast rules when it comes to creating a proper downlight layout. If I was going to make a "rule," it would be "Use as many downlights as you need, but as few as you can get away with." Most layouts have too many downlights. Not only does this overlight the space, but it also creates the dreaded "swiss cheese" problem. Where it looks like the ceiling has way too many holes in it. There are many reasons you don't need to overlight a space, but trust me when I say our eyes adjust.
Avoid Scalloping With Proper Off-The-Wall Spacing
I love scallops at dinner, but the weird cones of light you see on the wall from recessed cans, those are the wrong kind of scallops. They happen because of poor selections of beam angles and poor placement off the wall. The good news is there's a straightforward exercise you can do to avoid this issue.

How To Avoid the Scallop
1. Draw a section reflecting the ceiling height and proposed fixture distance off the wall
2. Look up the beam spread of the fixture
3. Using that angle draw a triangle from the aperture down to the floor.
4. If that triangle hits the wall, the place where it hits will be the scallop cone on the wall.
If you are getting scalloping, then you can either move the fixtures further away from the wall, narrow the beam of the lights, or both.
Find the Rhythm
I mentioned earlier my golden rule for downlight layouts. When you're trying to layout downlights, think about finding your layout's rhythm and add downlights as they make sense. Here’s an example.

Many thanks to Tristan Gary of Tristan Gary Designs for this layout.
Ready For More?
Kitchen lighting (like most residential light) is all about creating layers of light. Downlighting maintains a consistent light level for all of the kitchen's different purposes within the home. When combined with decoratives and task lighting, downlights can not only be functional but enhance the beauty of all your other finishes. If you’re interested in how to layout specific products, let me know. I can help or put you in touch with your rep. Or, you can hire an independent lighting designer.


